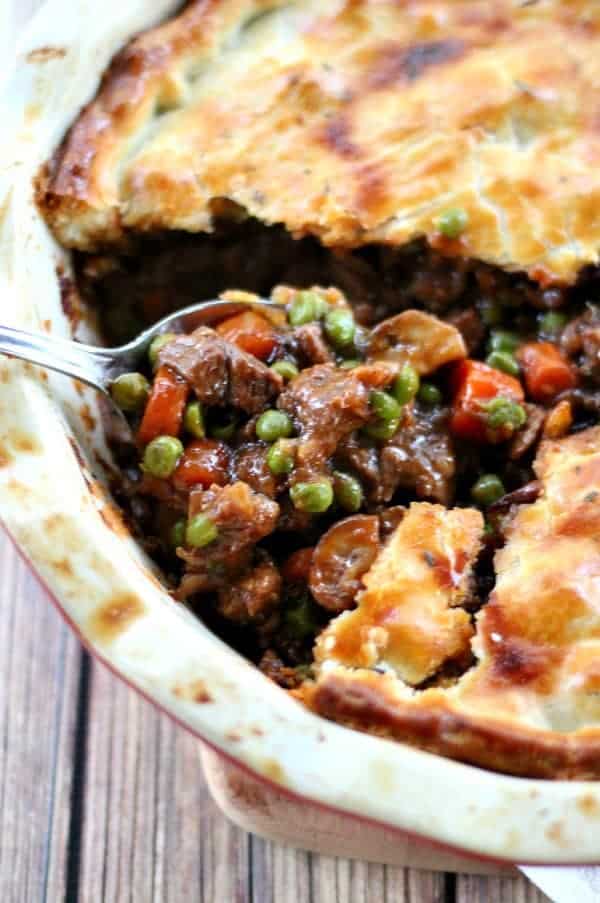
Imagine a cold evening, the kind where you yearn for warmth, comfort, and a meal that feels like a loving embrace. For many, that craving is perfectly satisfied by a hearty, homemade beef pot pie. But not just any pot pie – one that delivers tender, melt-in-your-mouth beef, vibrant vegetables, and a rich, savory gravy, all encased in a golden, flaky crust. The kind of pot pie you’d expect from a bustling bistro, yet entirely achievable in your own kitchen. This isn't just dinner; it's an experience, a true testament to the power of classic comfort food.
While some might associate such culinary delights with complex techniques, we're here to show you that restaurant-quality results are within reach, even for the most novice cook. This guide focuses on simple, time-tested methods that guarantee fall-apart tender meat and a symphony of flavors in every bite. Say goodbye to tough beef and watery gravy, and hello to your new favorite Easy Homemade Beef Pot Pie: Your Go-To Comfort Food.
Why This Beef Pot Pie Recipe Stands Out for Tender Meat and Flavor
What elevates a good beef pot pie to a truly exceptional one? It boils down to a few key principles that this recipe masterfully employs:
- Unbeatable Tenderness: The star of any beef pot pie is, of course, the beef itself. Our method relies on a slow-simmering technique that gently breaks down connective tissues, transforming even leaner cuts into incredibly tender morsels. This isn't just about cooking; it's about coaxing out the best texture possible.
- Rich, Silky Gravy: The gravy acts as the unifying force, coating every ingredient in a luscious, flavorful blanket. We'll show you how to achieve a perfectly thickened, savory gravy without any lumps or last-minute scrambling.
- Flaky, Golden Crust: A great crust is the crowning glory. Whether you opt for a convenient store-bought option or a homemade marvel, we'll ensure it bakes up beautifully golden and provides that satisfying crunch with every spoonful.
- Simple, Foolproof Techniques: You don't need a culinary degree to create something extraordinary. Each step is designed to be straightforward, ensuring consistent, delicious results every time.
- Flexible Preparation: Life is busy, and your kitchen shouldn't add to the stress. This recipe offers incredible flexibility, allowing you to prepare components ahead of time, making it perfect for busy weeknights or relaxed weekend cooking.
Essential Ingredients for Your Perfect Beef Pot Pie
The foundation of any great dish lies in its ingredients. For a truly memorable beef pot pie, selecting and preparing your components with care makes all the difference.
Choosing Your Beef for Ultimate Tenderness
The type of beef you choose, and how you treat it, is paramount to achieving that coveted tender texture:
- Sirloin Steak (1 pound, cubed): A fantastic choice for its flavor and relatively quick tenderizing. Sirloin, when slow-simmered, becomes wonderfully succulent without being overly fatty. Cut it into uniform 1-inch cubes to ensure even cooking.
- Chuck Roast (budget-friendly alternative): If you're looking for a more economical option or desire an even richer, deeper flavor, chuck roast is your friend. This cut is packed with connective tissue that, when cooked low and slow, renders down into gelatin, creating an incredibly tender, juicy result. Just be prepared for a slightly longer simmering time to achieve its full potential.
- Seasoning: Don't underestimate the power of good old salt and freshly ground black pepper. Season your beef generously before browning. Kosher salt provides a clean, consistent flavor, and freshly ground pepper offers a superior aroma and subtle heat.
Crafting the Flavorful Gravy Base
- Beef Broth (14-ounce can): This forms the liquid backbone of your gravy. Opt for a low-sodium variety to control the overall saltiness of your dish. For an even deeper, more complex flavor profile, consider splurging on quality beef bone broth. The extra collagen in bone broth adds body and a luxurious mouthfeel.
- Cornstarch (3 tablespoons) & Water (⅓ cup): This dynamic duo is the secret to a perfectly thickened, lump-free gravy. Always mix cornstarch with cold water to form a slurry before adding it to hot liquids. Adding it directly to hot broth will result in lumps that are nearly impossible to whisk away. The cold water prevents the starch granules from clumping and allows them to disperse evenly, leading to a smooth, glossy gravy.
Vegetables for Color, Texture, and Nutrition
Beyond the beef, the vegetables contribute crucial sweetness, texture, and nutritional value, making your beef pot pie a complete meal.
- Carrots (3 large, diced): These add natural sweetness and a beautiful orange hue. Dice them into uniform ½-inch pieces. This not only makes for a prettier presentation but also ensures they cook evenly and are tender-crisp, not mushy or raw.
- Potatoes (3 medium, cubed): For heartiness and creaminess, potatoes are indispensable. Yukon Golds are an excellent choice because they hold their shape well during simmering while still developing a wonderfully buttery texture. Cut them into ½-inch cubes, similar to the carrots, for consistent cooking.
- Frozen Green Peas (1 cup, thawed): These bright green gems are added towards the end. There's no need to pre-cook them; they'll heat through perfectly in the hot filling during baking, retaining their vibrant color and sweet flavor. Thawing them briefly prevents them from chilling down your filling too much.
And, of course, you'll need two 9-inch refrigerated pie crusts for that irresistible flaky top and bottom. While homemade crusts are lovely, store-bought options offer incredible convenience without sacrificing much on flavor or texture for this kind of dish.
The Simple Steps to Tender Beef Pot Pie Filling
The heart of your restaurant-quality beef pot pie lies in its tender filling. Follow these steps to ensure every bite is packed with flavor and exquisite texture.
- Browning the Beef: This crucial first step isn't just about cooking the meat; it's about developing deep, rich flavor through the Maillard reaction. Heat a little oil in a large Dutch oven or heavy-bottomed pot over medium-high heat. Add your seasoned beef cubes in a single layer, working in batches if necessary to avoid overcrowding the pan. Brown the beef on all sides until a beautiful crust forms. This creates a fond (the flavorful bits stuck to the bottom of the pan) that will become the foundation of your gravy.
- Building the Flavor Base: Once the beef is browned and set aside, add your diced carrots to the pot and sauté for 5-7 minutes until they start to soften slightly and release their sweetness.
- The Slow Simmer for Tenderness: Return the browned beef to the pot. Pour in your beef broth and enough water to just cover the meat and vegetables. Bring the mixture to a gentle simmer, then reduce the heat to low, cover, and let it cook. For sirloin, this might take 45-60 minutes. For chuck roast, you'll want to simmer for 1.5-2 hours, or even longer, until the beef is fork-tender. The longer, slower cooking method is key to breaking down those tough fibers and achieving melt-in-your-mouth results.
- Adding Potatoes and Thickening the Gravy: Once the beef is nearly tender, add the cubed potatoes. Continue to simmer until the potatoes are tender (about 15-20 minutes). In a small bowl, whisk together the cornstarch and cold water until no lumps remain. Slowly pour this slurry into the simmering pot, stirring constantly. Continue to stir until the gravy thickens to your desired consistency – it should be rich and coating, not watery. Season generously with additional salt and pepper to taste.
- Finishing with Peas: Remove the pot from the heat and stir in the thawed green peas. Their residual heat will warm them through perfectly, keeping them bright green and tender-crisp.
Alternate Cooking Methods for the Filling:
- Slow Cooker: Combine all filling ingredients (except cornstarch slurry and peas) in your slow cooker. Cook on high for 4-6 hours or until the meat is tender. Towards the end, if the sauce is too watery, you can either cook uncovered for the last hour to reduce it, or stir in your cornstarch slurry to thicken.
- Pressure Cooker/Instant Pot: Brown the beef, then add the remaining filling ingredients (excluding cornstarch slurry and peas). Cook on the meat/stew setting for 30-45 minutes with natural release. Again, if the sauce needs thickening, use the sauté function to reduce or add the cornstarch slurry.
Assembling and Baking Your Golden Beef Pot Pie
With your delectable filling ready, it’s time to bring your beef pot pie to life.
- Prepare Your Crusts: Unroll one refrigerated pie crust and gently fit it into a 9-inch pie plate. Trim any excess, leaving a slight overhang.
- Fill 'Er Up: Pour the slightly cooled beef and vegetable filling into the pie crust-lined plate. Don't overfill, leaving about ½ inch from the top edge.
- Top with Crust: Place the second pie crust over the filling. Trim the edges, then crimp the top and bottom crusts together to seal them. You can use a fork or your fingers for a decorative edge. Cut a few slits in the top crust to allow steam to escape during baking – this prevents a soggy crust and ensures even cooking. For an extra golden shine, you can brush the top with an egg wash (one egg whisked with a tablespoon of water).
- Bake to Golden Perfection: Bake in a preheated oven at 400°F (200°C) for 35-45 minutes, or until the crust is beautifully golden brown and the filling is bubbling. If the crust starts to brown too quickly, loosely tent it with aluminum foil.
- Rest and Serve: Let the beef pot pie rest for 10-15 minutes after baking. This allows the filling to set slightly and prevents it from spilling out when you slice into that glorious, flaky crust.
Pro Tips for Your Best Beef Pot Pie Yet
- Make-Ahead Mastery: The filling for your beef pot pie can be made up to two days in advance and stored in an airtight container in the refrigerator. This is a fantastic time-saver for busy weeknights! For even greater convenience, you can assemble the entire unbaked pie a day ahead and keep it in the fridge until you're ready to bake. Simply add a few extra minutes to the baking time if baking from chilled. For more detailed make-ahead strategies, check out our guide: Make-Ahead Beef Pot Pie: Flexible Prep for Busy Cooks.
- Storage: Baked beef pot pie will last for up to 3 days in the refrigerator when stored in a sealed container.
- Reheating: For best results, reheat slices of pot pie in the oven at 300-325°F (150-160°C) until warmed through and the crust is crisp again. Microwaving is an option, but it may soften the crust.
- Customize Your Veggies: Feel free to add other root vegetables like parsnips or celery, or even mushrooms, for added depth and variety. Just ensure they are cut to similar sizes for even cooking.
There's an undeniable magic in a homemade beef pot pie – especially one that boasts tender meat, a rich gravy, and a perfectly flaky crust. By following these simple yet effective steps, you can achieve restaurant-quality results in your own kitchen, transforming a humble dish into an extraordinary meal. It’s more than just food; it’s a warm hug, a shared tradition, and a testament to the comforting power of a well-made classic. So gather your ingredients, take a deep breath, and prepare to create a culinary masterpiece that will be requested again and again.
